Why Re-Caulking Matters More Than You Might Realize
The thin bead of caulk running along your bathtub's edge does a job that's easy to underestimate: it keeps water from migrating behind the tub surround and into the subfloor and wall cavity. When that seal cracks, shrinks, or grows mold, water finds its way in — slowly, quietly, and expensively. By the time you notice soft drywall or a soft floor, water has likely been infiltrating for months.
Re-caulking is genuinely one of the highest-return DIY tasks a homeowner can do. The materials cost under $20, the work takes a weekend afternoon, and it can prevent repair bills that run into the thousands. What most guides gloss over, though, is just how much preparation goes into the job. Slapping new caulk over old caulk is one of the most common and costly mistakes — it almost always fails within weeks.
This guide walks you through every phase, from recognizing when it's time to act to the small finishing details that make a caulk joint last for years.
What You'll Need Before You Start
Gathering the right tools before you begin saves you mid-project trips to the hardware store and keeps the work moving. Here's what the job actually requires:
- Caulk removal tool or plastic scraper — a dedicated plastic tool reduces the risk of scratching the tub surface compared to a metal blade
- Utility knife or oscillating multi-tool — for scoring and slicing through stubborn old caulk
- Chemical caulk remover — a gel softener that makes complete removal far easier, especially on silicone
- Isopropyl alcohol (rubbing alcohol) or denatured alcohol — for final surface degreasing
- Clean rags and paper towels
- Painter's tape — for clean, straight caulk lines
- Caulk gun
- Mold-resistant, 100% silicone or siliconized latex caulk — formulated for tub and tile use
- Wet finger or caulk-smoothing tool — for tooling the joint
A note on caulk selection: the terminology can be confusing. For a bathtub, you want a product specifically rated for wet areas, with mold inhibitors built in. To understand the difference between silicone and siliconized latex options, see our guide on choosing the right caulk or sealant.
When cutting the tip of a caulk tube, err on the side of too small — a 3/16-inch opening is usually right for a standard tub joint. You can always make a second pass to add material, but you can't take it back once it's in the joint.
Oversized openings deposit more caulk than the joint can hold, making tooling messy and leaving a lumpy, unprofessional finish that's also harder to cure evenly.
Keep a small spray bottle of water nearby when working with siliconized latex caulk — a light mist on your smoothing finger just before each pass gives you several extra seconds of working time before the surface begins to skin over.
Caulk skins quickly in warm, dry conditions. That extra working time is often the difference between a smooth, professional-looking joint and a streaky, fingerprint-marked one.
After removing old caulk, hold a flashlight at a low angle along the joint and look for any faint film of residue that catches the light. If you can see it, the surface isn't clean enough — adhesion will suffer.
Thin layers of silicone or soap film are nearly invisible under normal light but highly visible at a raking angle. Bond failure is almost always traceable to residue that wasn't fully removed.
Step 1 — Removing the Old Caulk Completely
This step takes the most time and effort, and it cannot be skipped or rushed. Any old caulk left behind will prevent the new material from bonding properly.
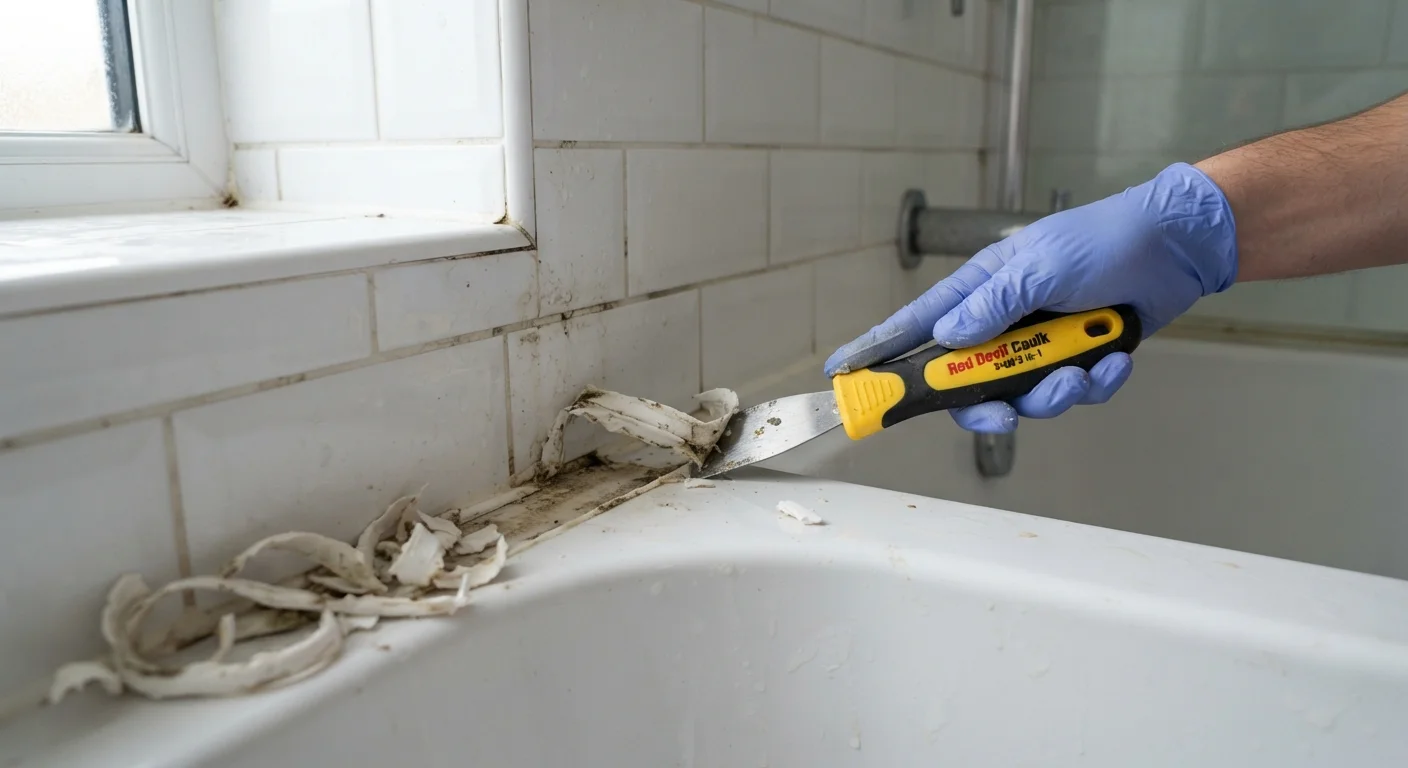
- Score the edges. Use a utility knife to cut along both sides of the old caulk bead where it meets the tub and the wall. This separates it from the surfaces it's bonded to and makes removal cleaner.
- Apply a chemical remover. For silicone caulk especially, apply a caulk-softening gel and let it sit for the time specified on the product — typically 2–4 hours. This dramatically reduces the force needed to pull the material away.
- Remove the bulk. Use your plastic scraper or a specialized caulk removal tool to peel away the softened caulk. Work in long, steady strokes. Avoid metal blades directly on the tub surface, as they can scratch porcelain or fiberglass.
- Get into the corners. Corners are where residue hides. Use the pointed tip of a plastic tool, a wooden skewer, or a folded piece of coarse tape to pull fragments from the joint.
Once you believe you're done, run your fingernail along the entire joint. Any remaining sticky or rubbery residue will catch — keep going until the surface feels smooth and clean.
Step 2 — Cleaning and Drying the Surface
Even after all the caulk is physically removed, invisible soap residue, skin oils, and mineral deposits remain on the surface. These contaminants will prevent the new caulk from bonding, regardless of how well you apply it.
Clean the entire joint area with a bathroom cleaner or diluted bleach solution, scrubbing with a stiff brush or old toothbrush. If there's any existing mold or mildew staining, treat it specifically — mold under new caulk will regrow and push the seal apart.
After cleaning, wipe the joint down with isopropyl alcohol on a clean rag. This removes residual grease and speeds up evaporation. Then comes the step most people underestimate: waiting for it to fully dry.
Do Not Caulk Over a Damp Surface
Moisture trapped beneath new caulk is the leading cause of early seal failure. Even if the surface looks dry, residual moisture in grout or porous tile can prevent proper adhesion. Always allow a minimum of 24 hours after cleaning, with ventilation running, before applying new caulk. In humid climates or poorly ventilated bathrooms, 48 hours is a safer standard.
In a bathroom environment, surfaces hold moisture longer than you'd expect. A visually dry tub surround may still have trapped moisture in porous grout or around the tub rim. In most cases, plan to wait at least 24 hours with good ventilation before caulking. Running a bathroom fan or a small dehumidifier speeds this up considerably.
Step 3 — Applying New Caulk Correctly
Before you pick up the caulk gun, fill the bathtub with water. This is a step that surprises many first-timers, but it matters: a full tub causes the tub shell to flex slightly downward under weight. If you caulk with an empty tub and someone later stands in it, the joint will stretch and crack. Caulking under load locks in the right amount of material for real-world use.
Apply painter's tape along both sides of the joint — one strip on the tub surface, one on the wall — leaving the gap exposed. This keeps the finished lines clean and professional-looking.
Cut the caulk tube tip at a 45-degree angle, making the opening slightly smaller than the gap you're filling — you can always widen it, but you can't undo a tip that's cut too large. Puncture the inner foil seal with a long nail or the tube's built-in piercer.
- Hold the gun at a consistent 45-degree angle to the joint.
- Apply steady, even pressure on the trigger while pulling the gun toward you along the joint in a single smooth pass.
- Work the full length of one side before stopping.
- Immediately wet your finger with water (for latex) or isopropyl alcohol (for silicone) and press the bead firmly into the joint with one smooth stroke, creating a slightly concave finish.
- Remove the painter's tape while the caulk is still wet, pulling it at a low angle away from the joint.
For other bathroom repairs that pair well with this project, the first-timer's guide to fixing a running toilet covers another high-impact DIY task you can tackle the same weekend.
Curing Time and Common Mistakes to Avoid
New caulk needs time to cure before it's exposed to water. Skinning over — when the surface feels dry to the touch — happens within an hour or two for most products. Full cure, where the material bonds completely and reaches its final flexibility, takes 24 to 48 hours depending on humidity, temperature, and product type. Check the specific product instructions, as some silicone formulas require longer.
During this window, keep the bathroom well-ventilated and do not use the shower or tub.
Mistakes That Undermine the Job
- Caulking over old caulk — new material won't bond to old, and the joint will fail quickly
- Caulking a wet or damp surface — the most common reason new caulk peels within weeks
- Using interior paintable latex caulk — this material isn't formulated for standing water and will break down and mold rapidly
- Applying too thick a bead — a thick bead takes longer to cure, traps moisture, and is harder to tool smoothly
- Skipping the water-fill step — leads to cracking once the tub is loaded with weight
How Long a Good Caulk Job Should Last
When done correctly — with thorough removal, a properly prepped surface, and an appropriate product — a tub caulk joint can last anywhere from 5 to 10 years before it needs attention. Regular cleaning with a mild, non-abrasive bathroom cleaner (avoiding harsh bleach products used too frequently) helps preserve the material. Some homeowners do a quick visual inspection annually, looking for any cracking, separation, or dark discoloration that signals moisture intrusion or mold growth beginning beneath the surface.
If you notice pinkish or dark spotting appearing on the caulk surface after several years, that's surface mold — a normal part of a wet environment — and not necessarily a reason to redo the entire job. But if the caulk is pulling away from the wall or tub, or if you can see gaps forming, it's time to start the process again.
The good news: now that you've done it once and understand what each step accomplishes, the next re-caulk will go faster and feel far more confident.